
SteFly Canopy Flasher Green
357,00 € – 611,99 €
incl. VAT plus shipping
Delivery time: 5-7 Werktage / Business Days
Note to all Competition Pilots
In October 2024, the FAI GLIDING COMMISSION (IGC) adopted the new version of the RULES FOR WORLD AND CONTINENTAL GLIDING CHAMPIONSHIPS , which states in section 4.1.1.d:
„Each competing sailplane must have an installed red or white strobe light of sufficient brightness to be clearly visible to oncoming traffic. The strobe light may operate continuously, or it may be activated only when the proximity awareness system detects other traffic in the vicinity.“
We therefore recommend that all competition pilots taking part in these international competitions install our red canopy flasher instead. It also features the most advanced technology and highest performance.
From a legal point of view, nothing changes. In Europe, EASA Standard Change CS-SC036b (INSTALLATION OF VISUAL AWARENESS LIGHTS) continues to regulate the installation of canopy flashers, without restricting the LED color.
Also in competitions that are based on the COMPETITION RULES FOR GLIDING CHAMPIONSHIPS from the German Gliding Federation DAeC, it is only written that the canopy flasher must be clearly visible from the front in daylight flying conditions. And due to the brightness of green LED light this is the case!
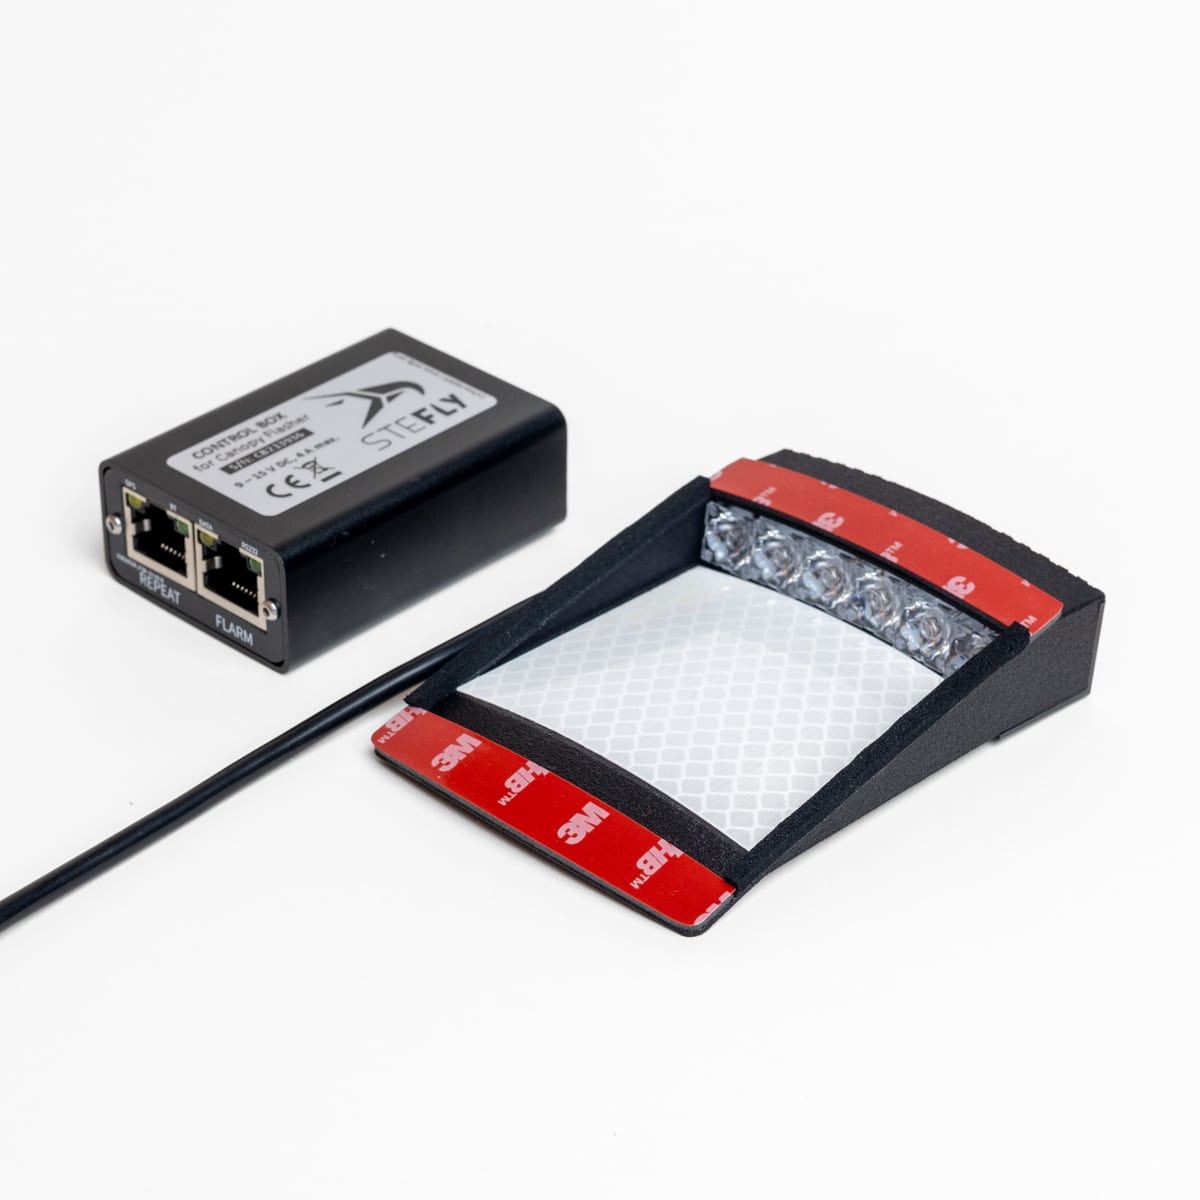
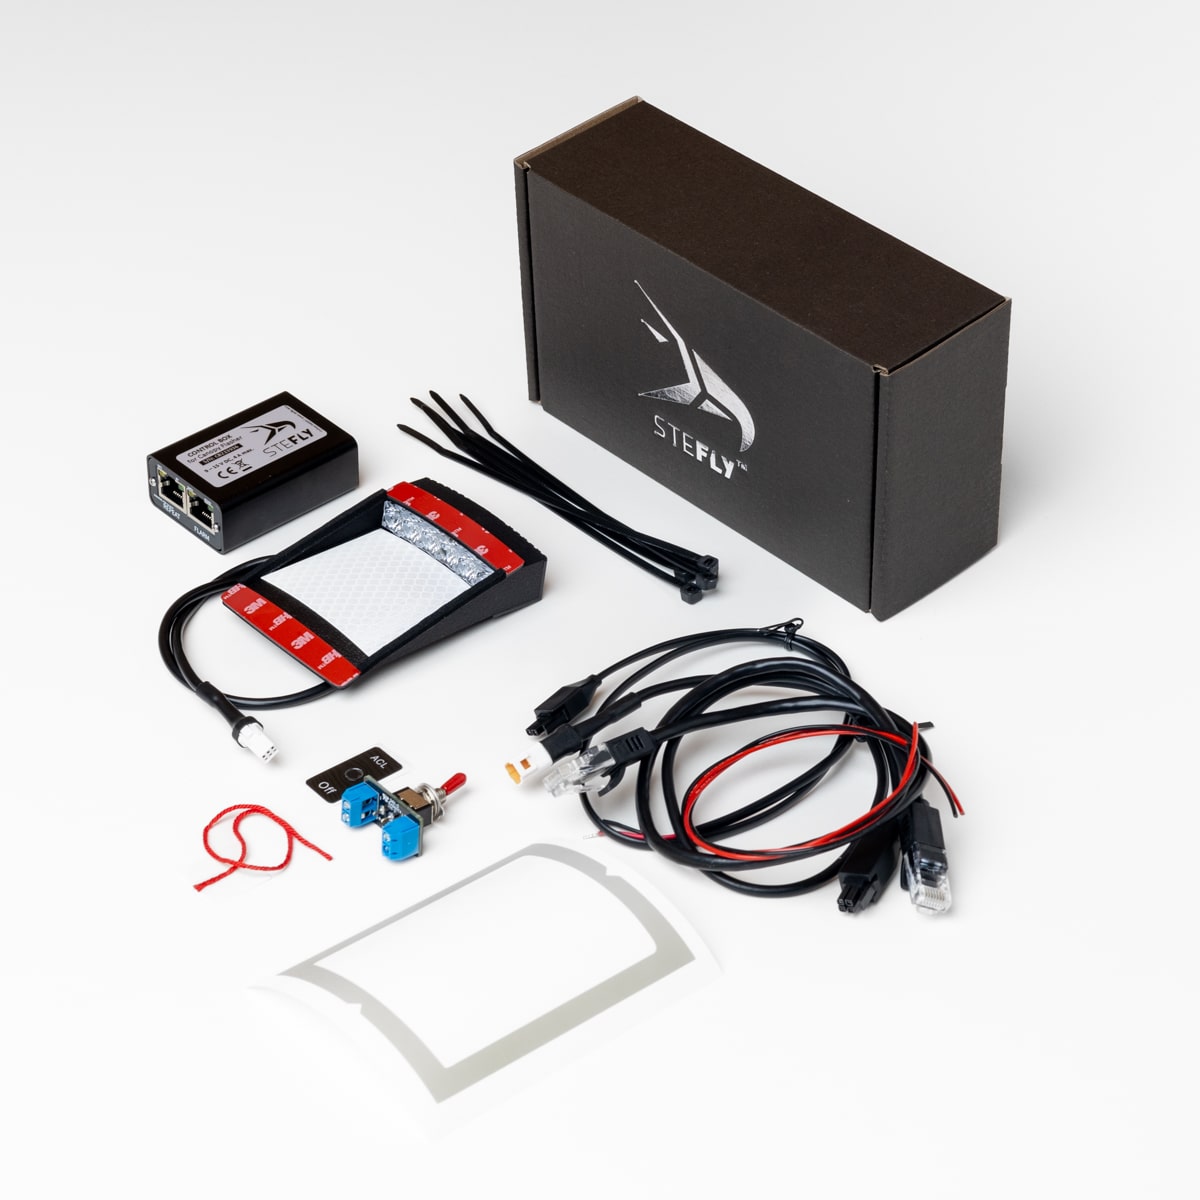
Scope of Delivery:
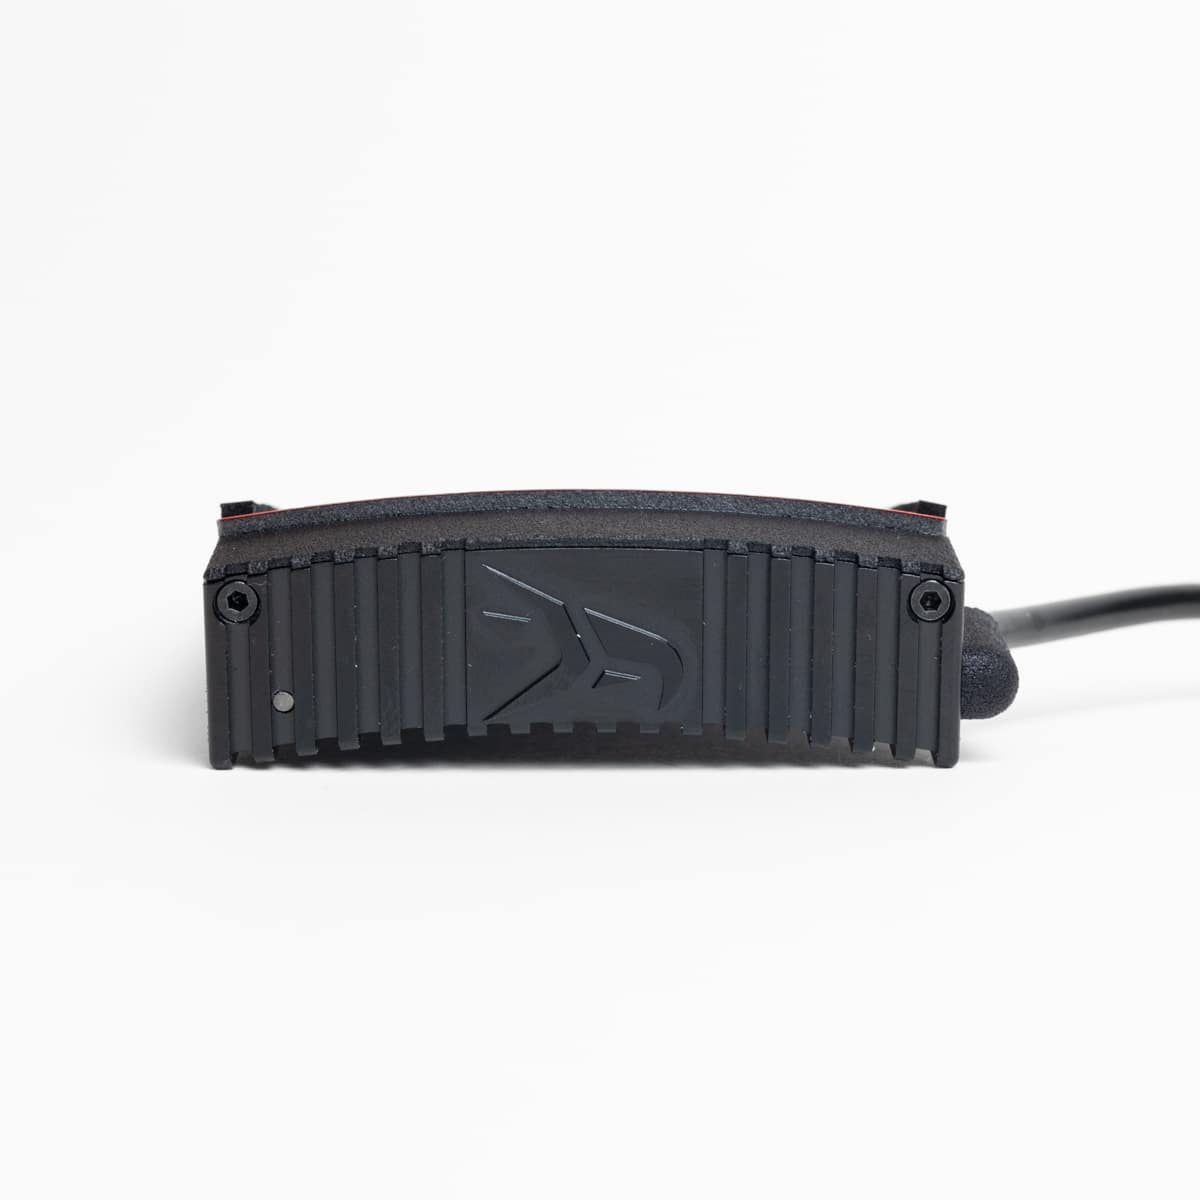
- SteFly Canopy Flasher with six green high power LEDs and black aluminum / SLS-printed polymer housing
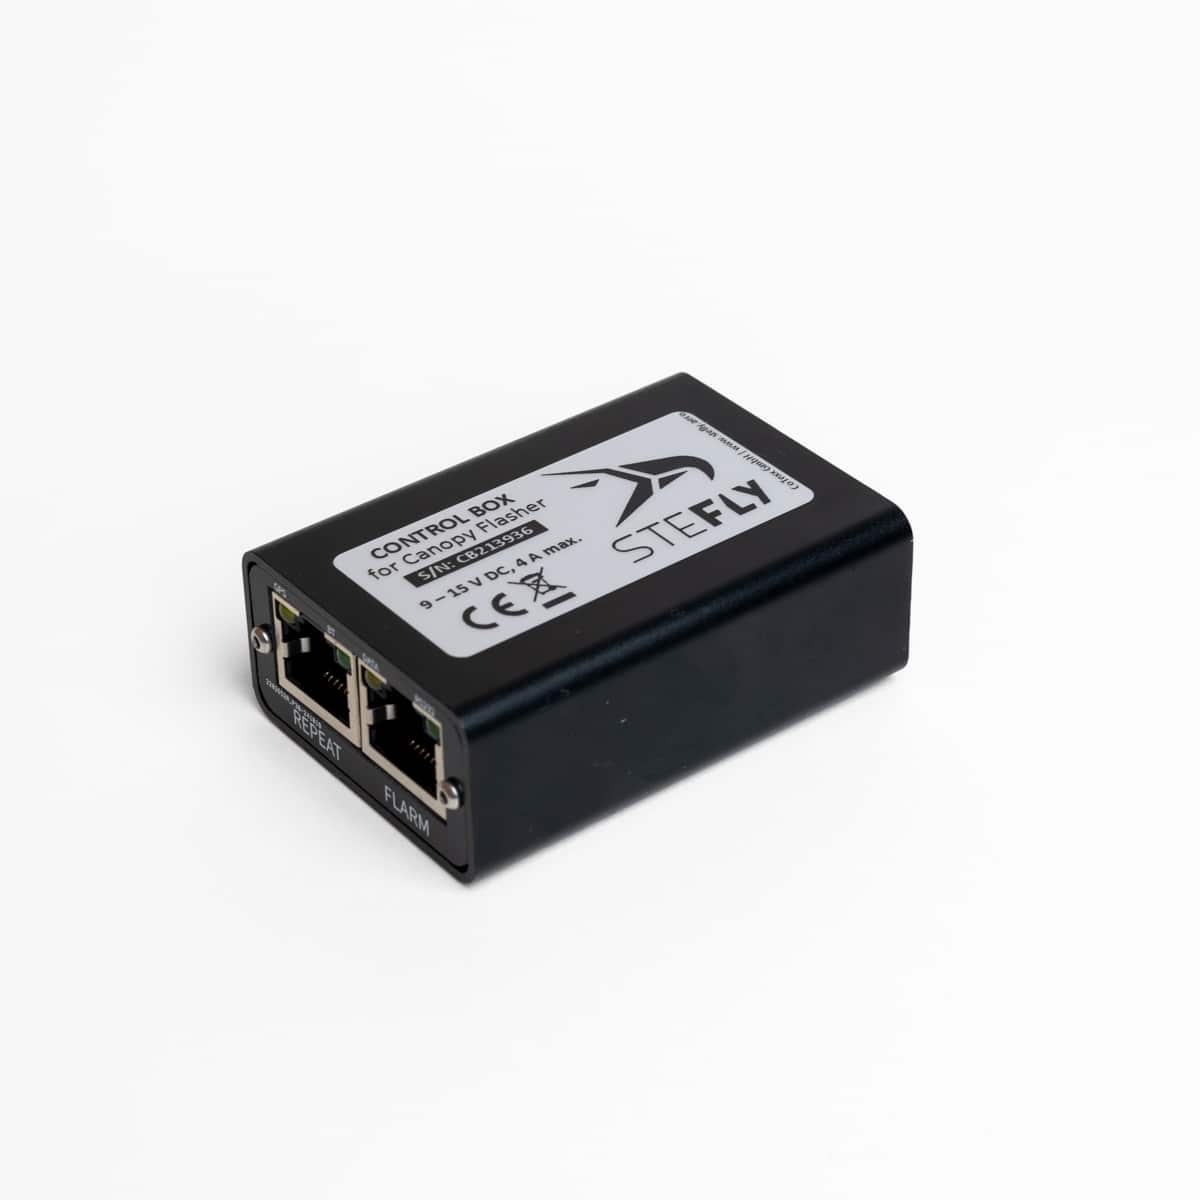
- Control Box for automatic on/off switching of the flasher when airborne and increasing of the flash intensity according to FLARM® collision warning data (not included in the scope of delivery of Canopy Flasher Essential!); Integrated Bluetooth® (can send FLARM® and position data to a mobile device) and WLAN (for updates)
- On/off switch with integrated 4 A fuse and labeling panel
- All required cables (12 VDC power supply to on-off switch / on-off switch to control box / control box to canopy flasher)
- Yaw string with clear adhesive pad


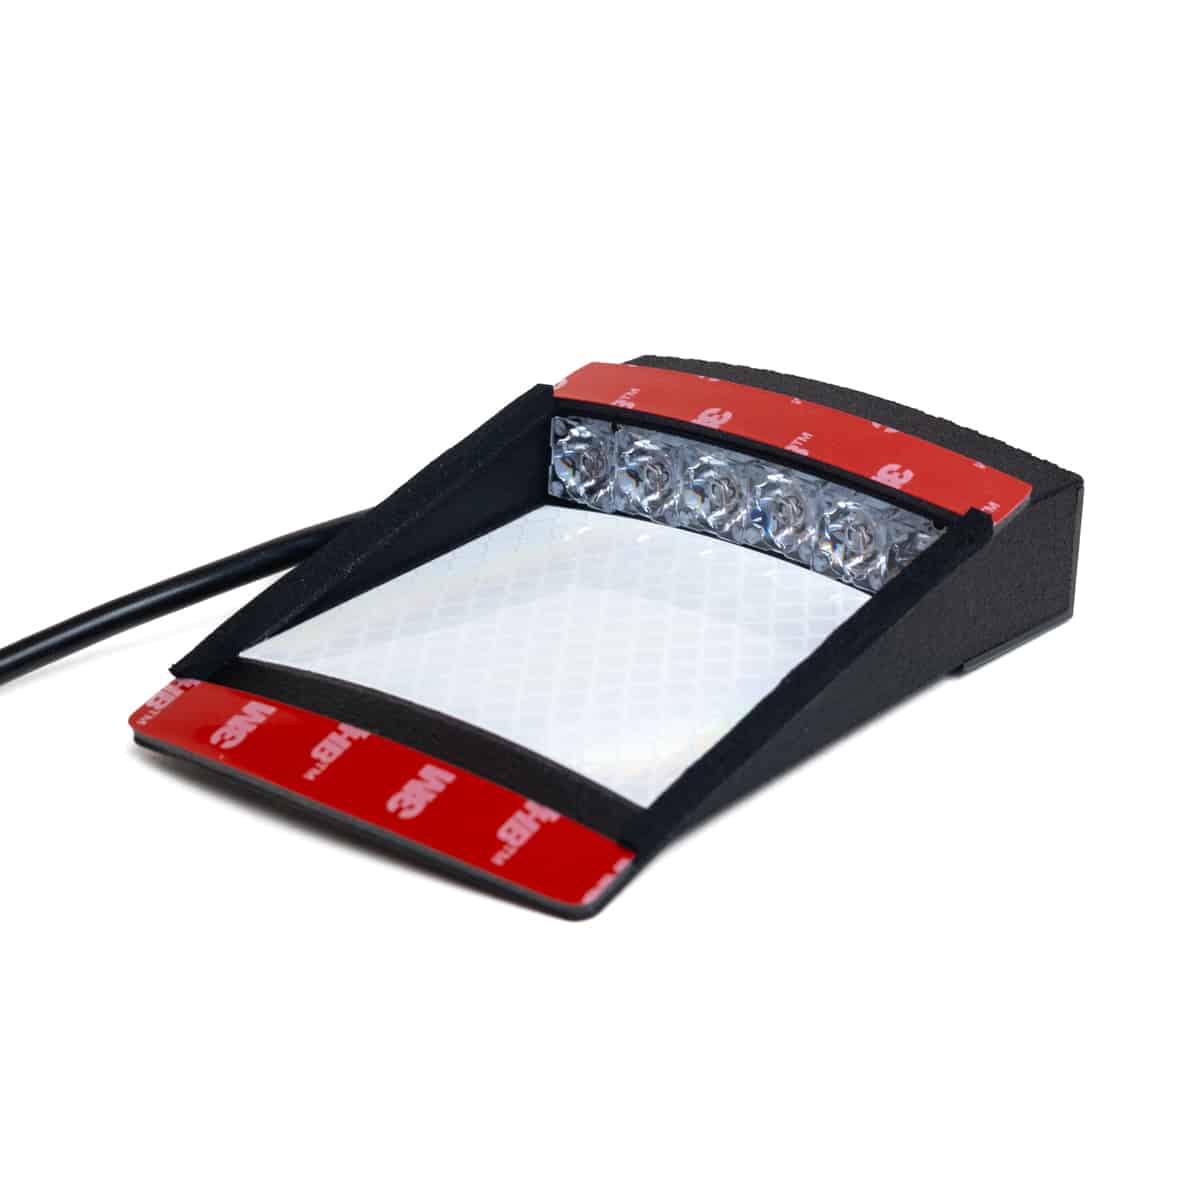
Highlights of Function and Design
- 6 green LEDs of latests generation with a peak wavelength in the range of maximum perceptibility for the human eye. Thanks to the aluminum heat sink, these can be operated at very high currents for maximum brightness.
- The light beam formed by the lenses warns oncoming aircraft, especially from the front
- At the same time, the high-performance LEDs produce enough light to widen the angle of reflected beam, so that aircraft appearing diagonally in front of your own glider are also warned
- Stray light is not absorbed by the housing, but is instead reflected by the high-quality Reflective foil, as used on road signs. Therefore all the light coming out of the LEDs contributes to warn other pilots.

Green, Red, Green
The IGC's decision meant we had to develop a red canopy flasher. Due to the significantly higher waste heat output, we had to increase the size of the heat sink compared to the first generation of green canopy flashers and adapt the electronics to the higher power to achieve a comparable brightness.
Now we can use the housing optimized for the red canopy flasher and the revised electronics for the new green canopy flasher as well. Compared to our red canopy flasher, the light output increases by approx. 50%.
Back to the Roots
One of the outstanding features of our first generation of visual awareness lights was that we only offered them with green LEDs.
In October 2024, the IGC decided that only visual awareness lights of red or white colour will be accepted for international competitions. The unofficial reason given is that the IGC is adopting the light colors required by the US Federal Aviation Administration (FAA) for certified anti-collision lights. When the regulation was made in 1964, LEDs had already been invented, but green LEDs have only really taken off in the last 10 years. And according to the EASA, canopy flashers are explicitly not anti-collision lights but visual awareness lights designed to draw the attention of other pilots to opposite flying aircraft. In our opinion, brightness is the top priority here.
Even the top models of construction and measuring lasers rely on green rather than red laser color due to its significantly better visibility.

Relative brightness sensitivity curves describe how the human eye perceives brightness as a function of the light colour (red curve: perception during daylight; blue curve: perception in dimmed conditions)
Green for photometric reasons: Green is significantly brighter than red for the human eye. This is the reason why green LEDs are that efficient.


Design Aspects
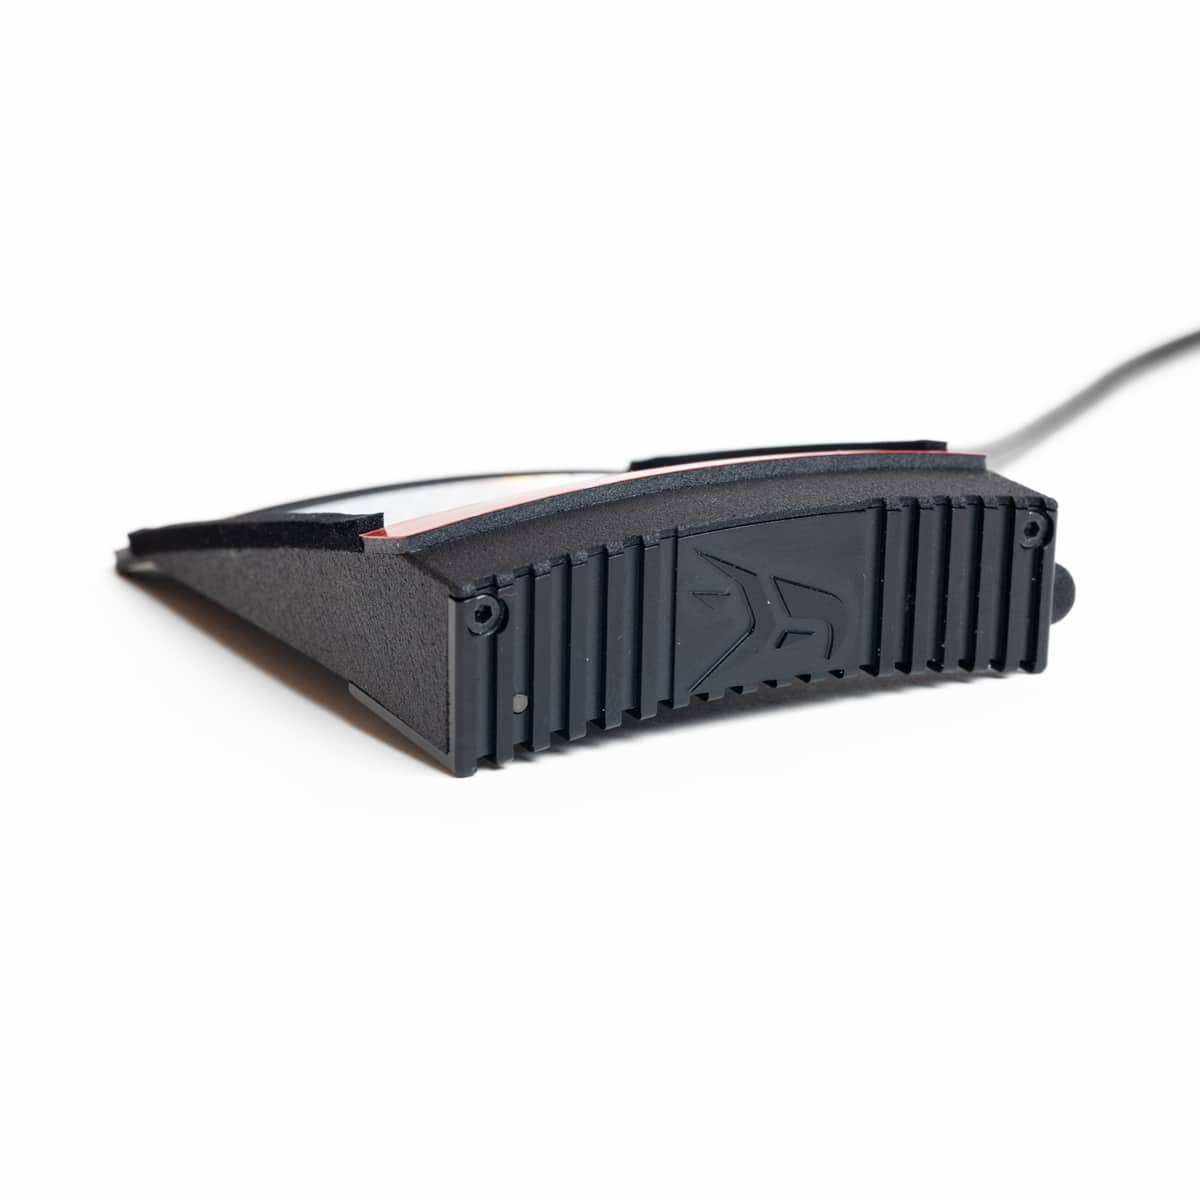
By arranging the individual LEDs at the smallest possible distance from the canopy glass and having the housing follow this curved contour, maximum space is left under the housing, e.g. for the ventilation flap. The flasher can be mounted far forward on the canopy. Together with the small dimensions, this allows the pilot to maintain a full view to the front. The canopy ventilation is also obstructed as little as possible.
There are again several housing shapes to choose from so that we can always offer the best solution for the individual canopy curvatures and space requirements of different aircraft types.
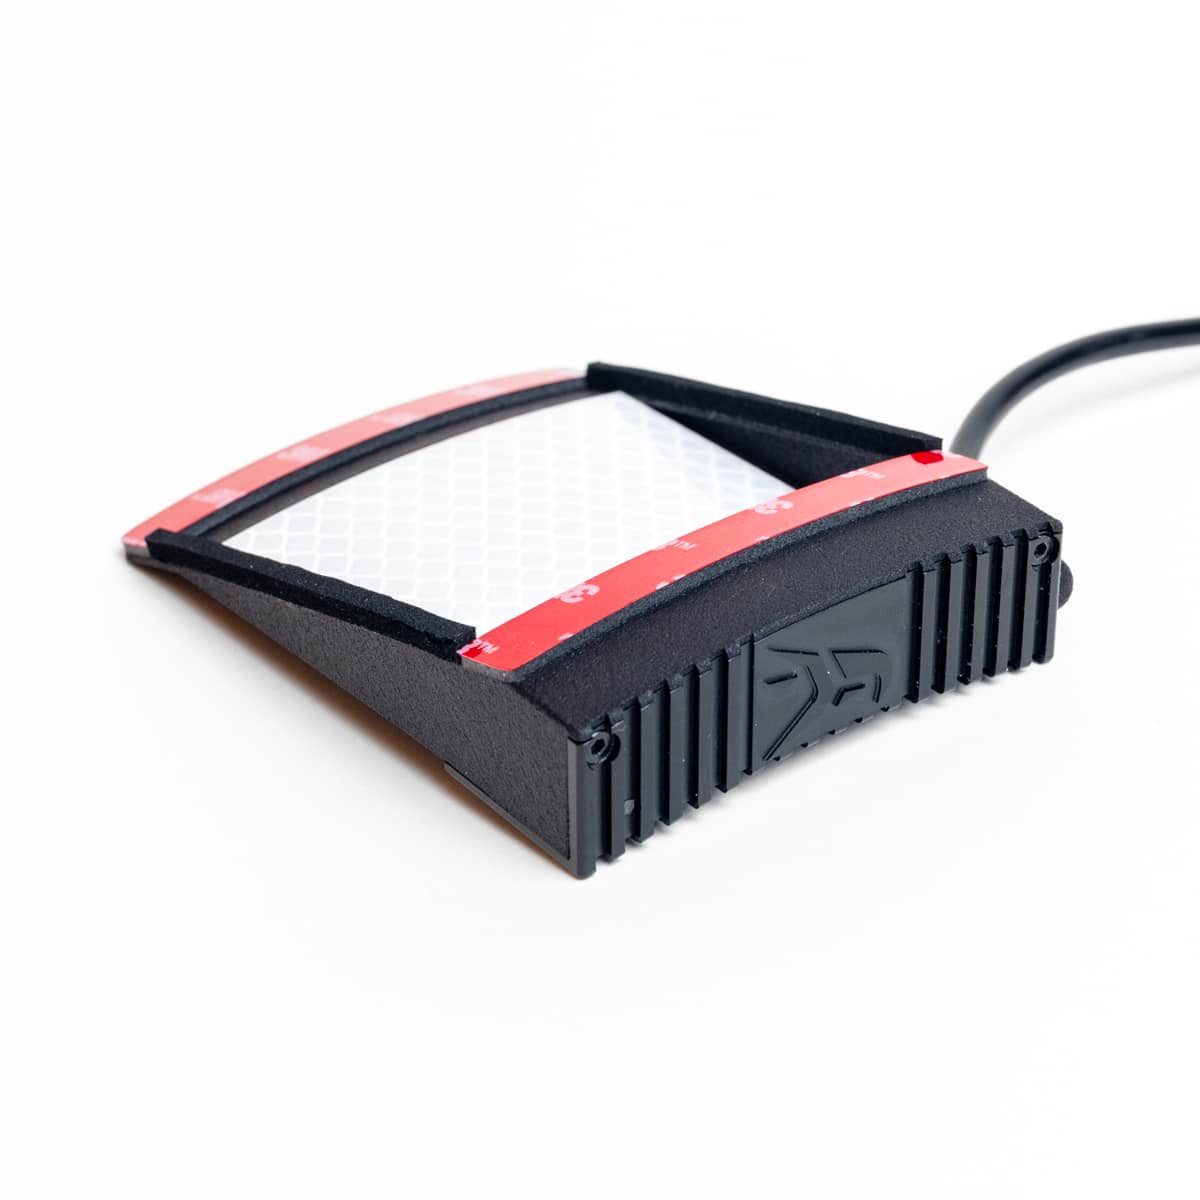
Aluminum Housing for Thermal Management
Red LEDs produce a lower luminous flux compared to green LEDs with the same energy input. The energy that is not converted into light must be dissipated into the environment as waste heat. This requires an efficient waste heat concept and, in particular, a heat sink with a large surface area made of a material with high thermal conductivity. All plastics have a very low thermal conductivity of 0.23 W/(m*K) for nylon, for example. Aluminum, on the other hand, has a thermal conductivity of 220 W/(m*K) - that is 950 times better! A heat sink made of plastic is nearly useless and can only be used as a design element. Thanks to its greater thermal mass, an aluminum heat sink absorbs the heat emitted by the LEDs with every flash and continuously transfers it to the cooler outer surface of the heat sink. From there, it is absorbed by the ambient air.
In a nutshell:
- We rely on a milled aluminum heat sink for optimum cooling of the LEDs
- Perfect heat transfer for long LED life and high light output even in summer temperatures and with high solar radiation, because a cooler LED has a higher degree of efficiency
- Thanks to the heat sink, the 6 high-performance LEDs can be operated with a current and brightness that would be far from possible with a plastic heat sink
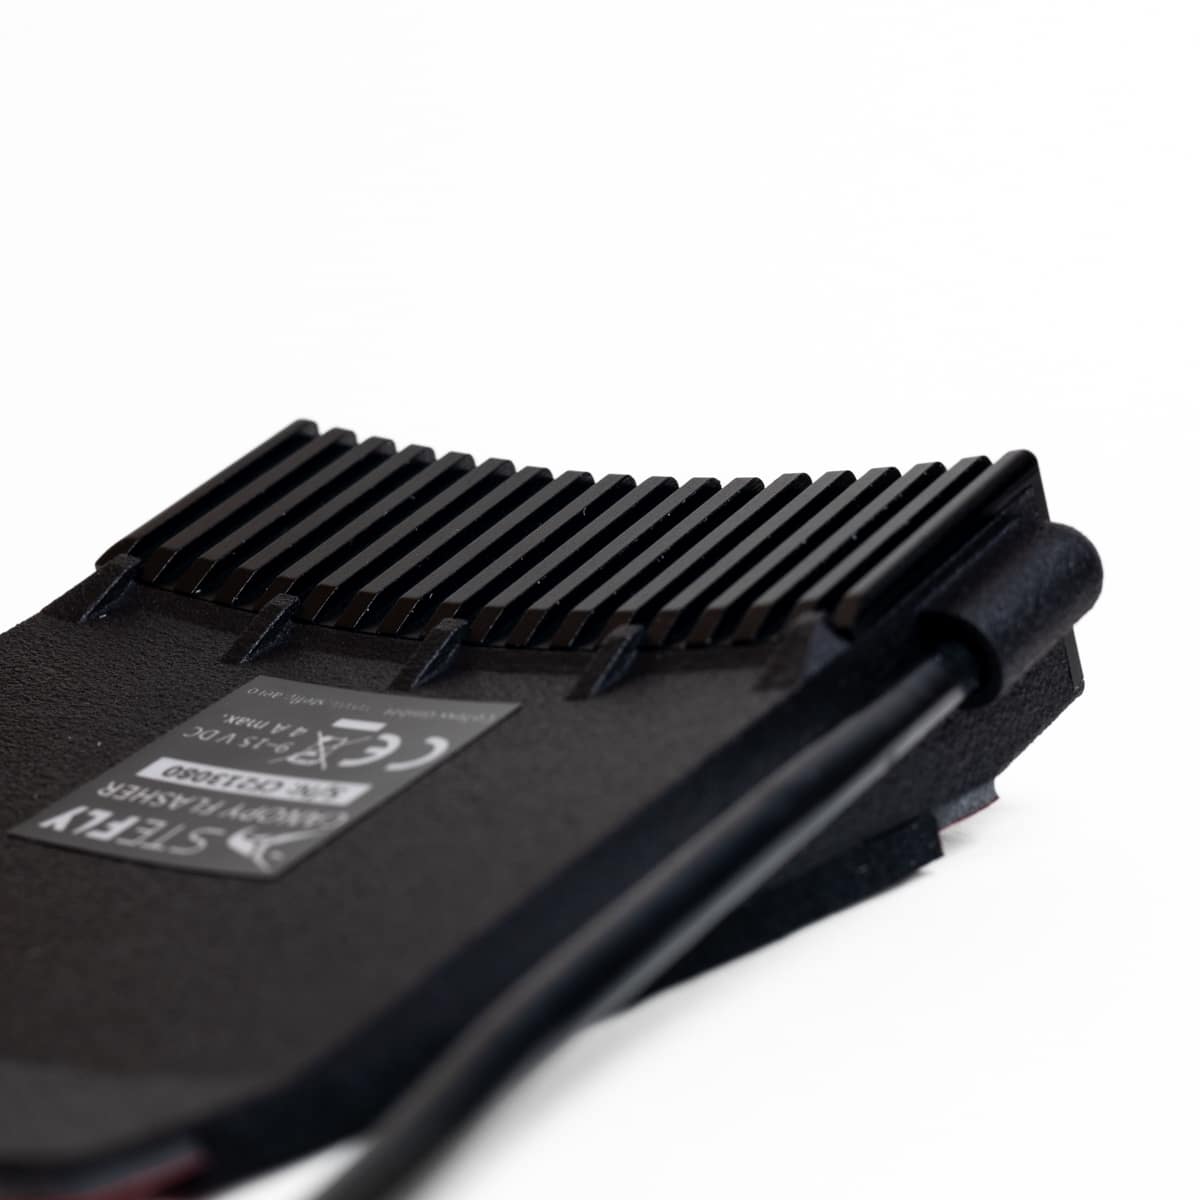
- The housing of the flasher is black anodized and provides the SteFly logo .
The housing also convinces with many other details:
- The front part of the housing is manufactured in a 3D laser-sintering process made from high-performance polyamide .
- To visually check whether and exactly when flashes of light are emitted, an optical light guide was integrated into the heat sink
- Double-sided 3M VHB acrylic tape reliably connects canopy flasher and acrylic glass
Every glider is unique.
- With several housing shapes and a variety of canopy connectors, we offer solutions for a variety of aircraft types. And our range of products continues to grow.
- Inquiries for aircraft that are not yet listed in our standard range are welcome!

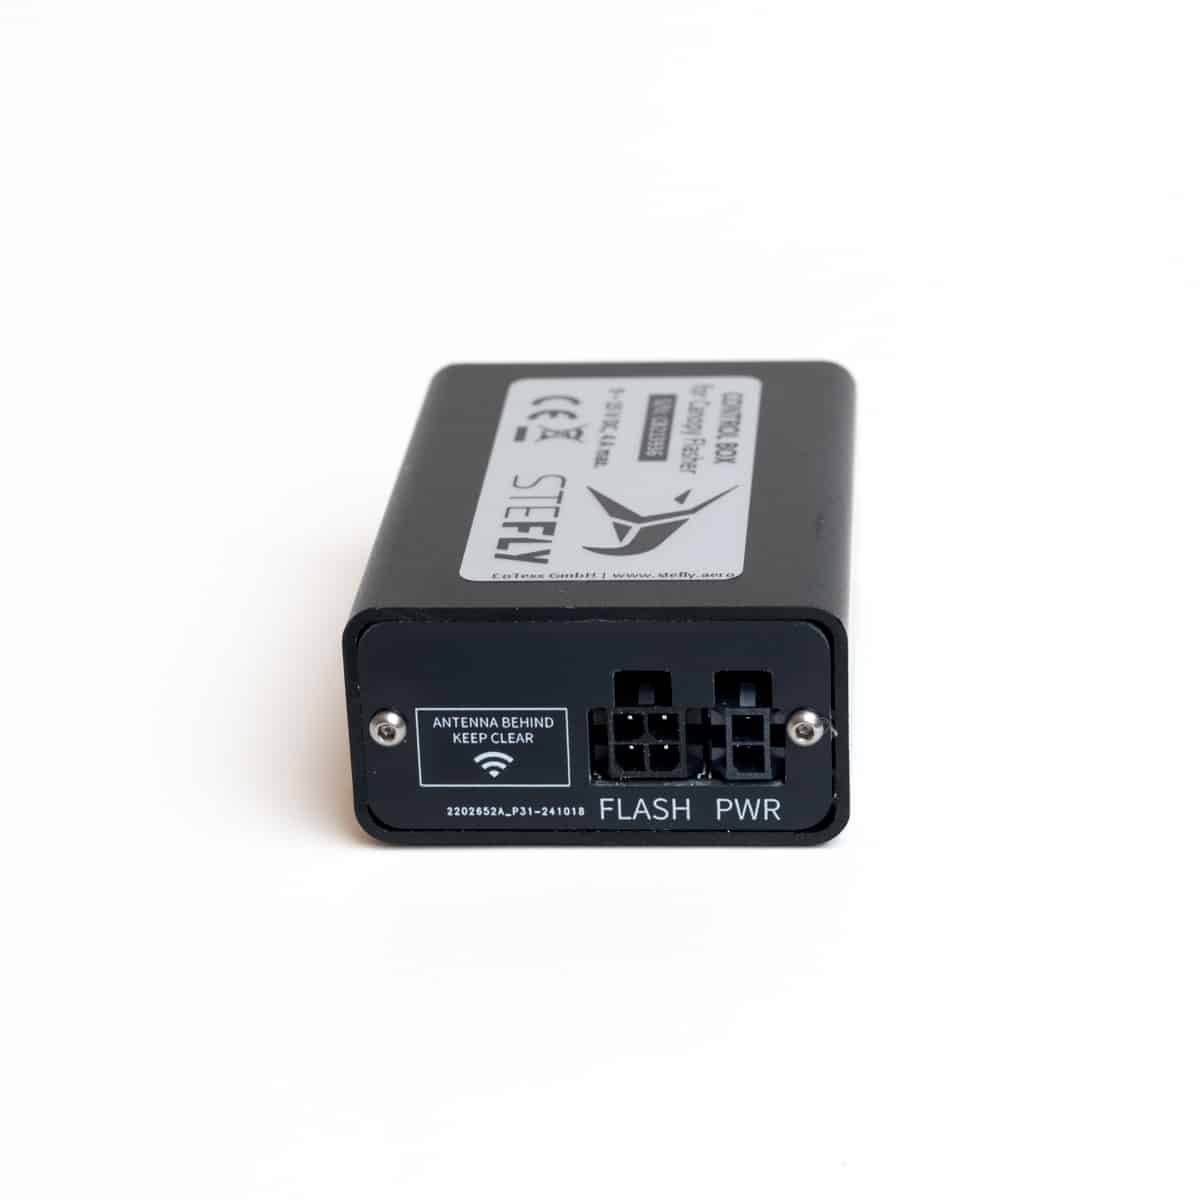
Control Box: The smart connection to FLARM

- Evaluates FLARM® signals of aircraft in the surrounding area
- Ensures that the canopy flasher only emits light signals when the aircraft is flying, which prevents dazzling of start helpers or children on the ground looking directly into the canopy flasher
- Flash frequency increases, as soon as there is an airplane in the vicinity approaching on potential collision course , which further increases the perceptibility

- Integrated Bluetooth module allows the transfer of FLARM®-data to mobile devices, so e.g. XC-Soar on the smartphone is able to show®FLARM traffic as well as your own GPS position e.g. in XC-Soar on the smartphone
- In addition WLAN Both comfortable setting the baud rate, flash frequency, and energy-saving modes via a web app
- firmware updates are implemented via Wi-Fi

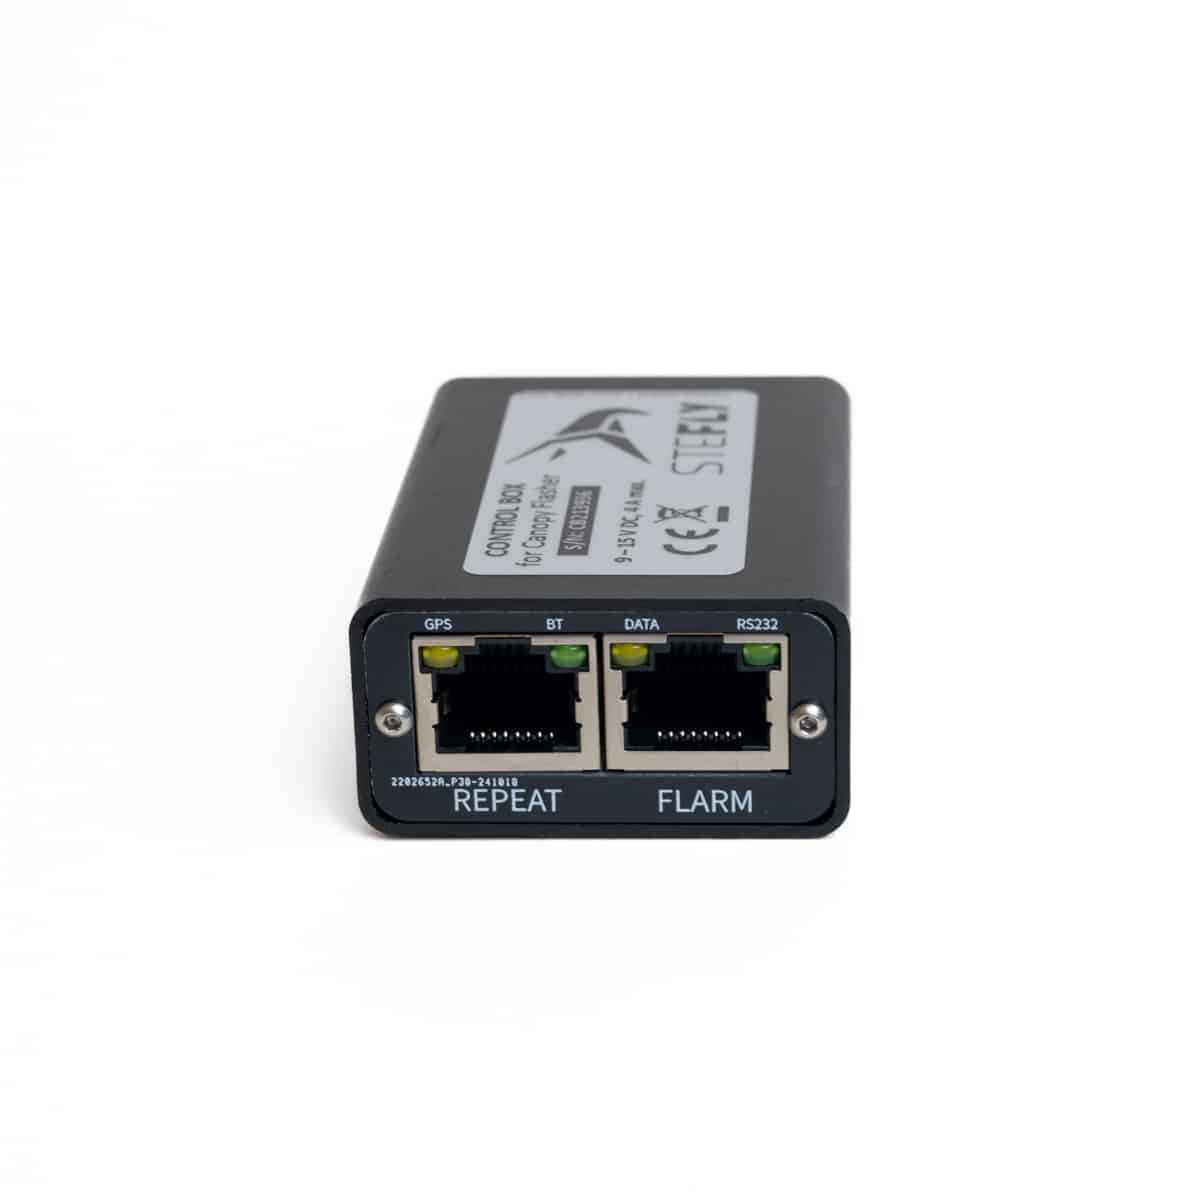
- The control box has two RJ45 sockets.
- The incoming Flarm signal is processed by the control box and forwarded to the canopy flasher
- A Flarm display, for example, can be connected to the “REPEAT” port, eliminating the need for a splitter during installation.

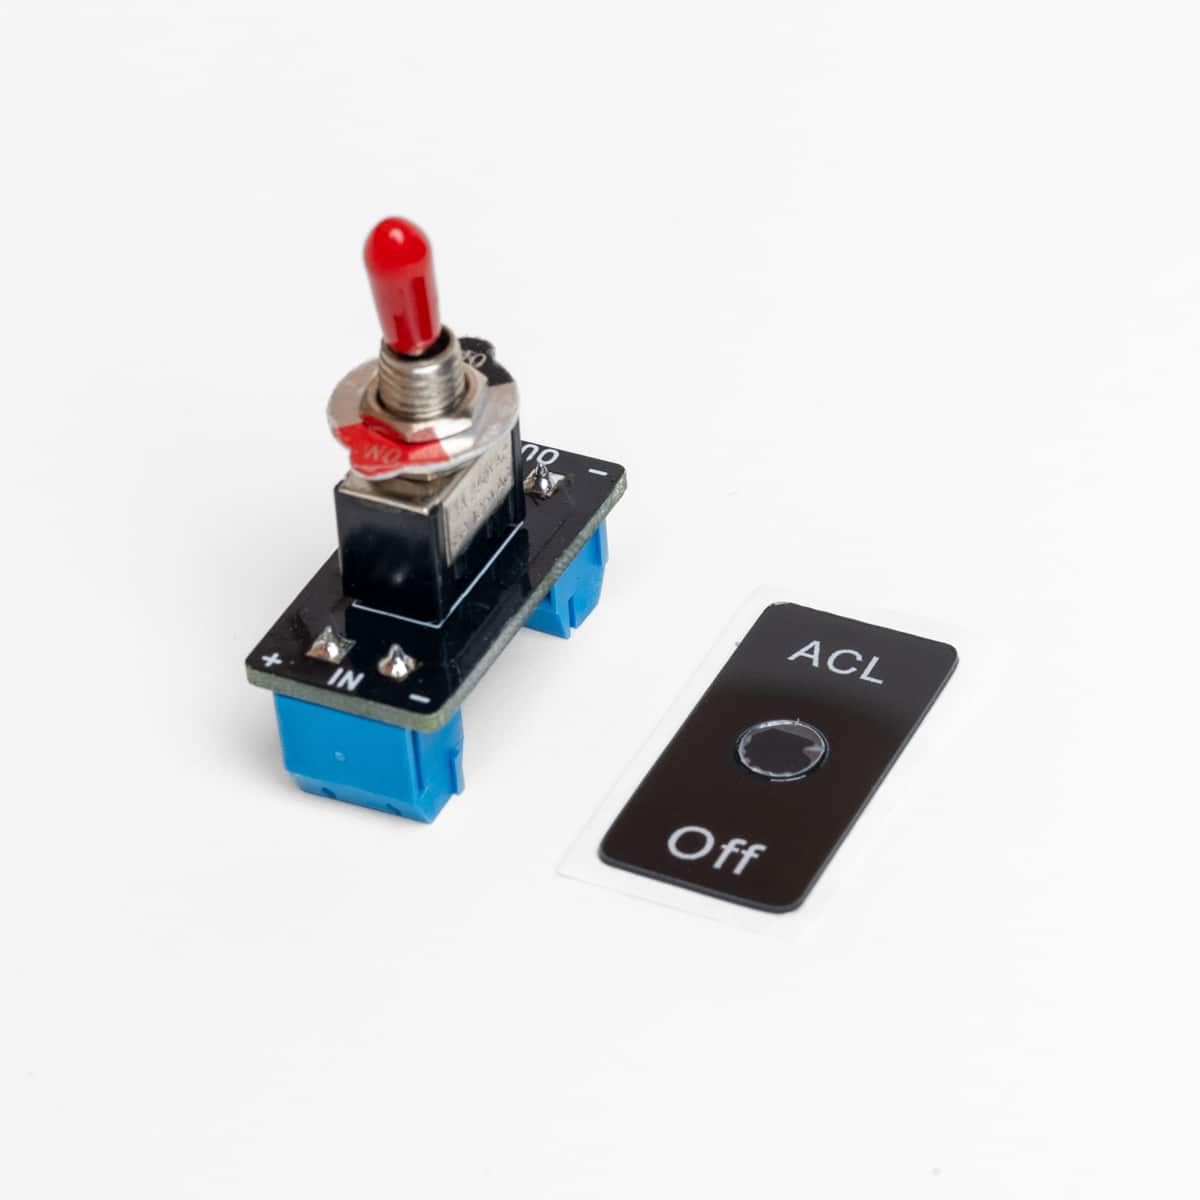
On-Off Switch
- The included Switch wird in das Instrumentenbrett integriert, um den Blitzer zu aktivieren
- The switch module has an integrated 4 A fuse as well as screw terminals for the cables
- The package includes the required label in form of a black cover, which can be used also as drilling template

Why does a Flarm connection to the canopy flasher make sense?

What is good for visual awareness also has a disadvantage: the more powerful the LEDs, the more care must be taken to ensure that no one (especially children) looks directly into the flash light from a short distance. We have therefore decided to only offer our LED flasher for gliders in combination with a control box. It evaluates FLARM signals and enables the LEDs to begin flashing automatically as soon as the aircraft is in the air. After landing, the canopy flasher switches off automatically. This only requires that the ACL switch on the instrument panel is set to "On". We deliberately did not use a control LED, which is usually attached to the back of the canopy flasher, to avoid reflections in the canopy. However, when the ACL switch on the instrument panel is flipped, the SteFly Canopy Flasher signals that it is working properly by two short, reduced-brightness flashes.
However, make absolutely sure that nobody is looking directly into the canopy flasher or into the reflected beam when the canopy flasher is switched on! This could possibly damage the retina temporarily or even permanently.
EASA believes that canopy flashers and other LED visual awareness lights contribute to flight safety and allows installation in accordance to EASA Standard Change CS-SC036b (INSTALLATION OF VISUAL AWARENESS LIGHTS). Accordingly, e.g. the effect on mass and center of gravity must be taken into account and the canopy must of course still be able to be ejected. The acceptance is carried out by an examiner.
Overview of the installation process:
- Determine the approximate position of the canopy flasher (ensure that the flap controlling the ventilation has enough clearance!)
- Degrease and clean the canopy in the area of the canopy flasher (only with water / dishwashing liquid mix, isopropanol, or cleaning gasoline).
- Tension a thread from the nose of the fuselage to the top of the vertical stabilizer
- Use a measuring tape to align the thread in the middle of the canopy and fix the thread with adhesive tape
- Remove the protective film from the adhesive tapes of the canopy flasher and attach the housing very lightly to the inside of the canopy. The center of the canopy flasher is marked by a raised line on the polymer housing at the front; at the rear, simply align it with the center of the 6 LEDs. Then, from a short distance away, check that the canopy flasher is positioned in the center of the canopy and aligned in the direction of flight. Finally, press the two adhesive surfaces of the flasher firmly onto the acrylic glass.
- Position the on/off switch in the instrument panel
- The labeling board of the switch also serves as a drilling template (drilling diameter 6 mm)
- Fasten the control box in front of the instrument panel (screws and clamps / cable ties / Velcro)
- Plug in the cables and connect the cables to the screw terminals of the on/off switch
- Function test for the version with Control Box:
- Turn the on/off switch and watch for two low-intensity flashes
- Activate the test mode of the web application within 2 minutes after switching on the canopy flasher (For details, see the installation instructions)
- Or, if Power Flarm® Fusion is installed, the Flarm®simulator app will activate the flash mode
Quick and Easy Installation - Even During the Gliding Season
Degrease an aircraft canopy made of acrylic glass / PMMA / Plexiglas® only with water with dishwashing detergent, isopropanol or benzene-free petroleum ether, but never acetone or other alcohol as these solvents may cause micro cracks!
Canopy Contact for Side-Opening Canopies
Connecting Canopy Flasher and Control Box by cable is complicated for sideways opening canopies, because clamping the cable during closing needs to be avoided. Sideways opening canopies are common for gliders manufactured by Schempp-Hirth. That's why we offer a special canopy contact. A module with three spring contacts is attached to the canopy near the frame using double-sided 3M VHB adhesive tape. The counterpart is screwed onto the instrument cover. When the canopy is closed, electrical connection is implemented between control box and canopy flasher.
Special Connector for the Canopy Jettison
On all aircraft types where the instrument panel is fixed to the canopy (e.g. Alexander Schleicher) or types where the canopy is hinged at the front (e.g. LS), the control box and canopy flasher may be connected with the cable included in scope of delivery, which has a special connector serving as predetermined breaking point.

When having selected the connectors we made sure that they separate automatically with little force in the event of an emergency release of the canopy. The locking lug has been removed as well. Therefore, please do not use cable ties to secure the plugged-in connectors and bind them together! Secure only the connector that goes to the control box, as this will remain connected to the aircraft even during canopy jettison.

If cable ties are applied during the canopy flasher installation, there must be provided a cable loop (at least 10 cm) in the area of the predetermined breaking point connector. The reason is that in the event of an emergency jettison, the canopy is now able to detach about 10 cm from the aircraft until the connection cable between Control Box and Flasher is fully tensioned. This ensures that canopy and fuselage disconnect from each other under all circumstances.
Instructions
Installation Manuals for Canopy Connectors
For side opening canopies with connector on the right side, e.g. Discus, Ventus, Janus, Duo Discus, Arcus, Nimbus, Pilatus B4:
DG doubleseater, e.G. DG 500, DG 1000, DG 1001:
Twin 1
Twin 2 and Twin 3
Astir CS

Firmware Updates Control Box
V01r15 April 2024:
V2.0.1 Februar 2025:
V2.0.2 April 2025:
Technical Data
LEDs: 6 green high-power LEDs; luminous flux approx. 50 % higher compared to our red LED canopy flasher; high current without overheating possible thanks to aluminum heat sink
Canopy Flasher Standard Housing: mass 51 g (incl. 40 cm cable), dimensions length x width x height 51 mm x 66 mm x 18 mm
Control Box: Gewicht 53 g, Abmessungen LxBxH 64 mm x 44 mm x 23 mm
On-Off Switch: mass 10 g, dimensions width x height 15 mm x 31 mm
Connection Cables: mass 57 g
Input voltage range: 9 to 17 V DC
Amperage: 150 mA for canopy flasher Essential @ 13,5 V
135 mA total for canopy flasher and Control Box @ 13,5 V and flashing frequency "low";
210 mA total for canopy flasher and Control Box @ 13,5 V and flashing frequency "medium";
Interfaces: 2 serial interfaces: 1x FLARM®-input and 1 x FLARM®-repeater (e.g. for AIR Traffic Display or FLARM®-Display), Bluetooth, WLAN
Operating Temperature: -30°C to +60°C
Material: Control box housing and heat sink of the canopy flasher made of black anodized aluminium; canopy flasher housing made of SLS-printed polymer, painted matt black; housing lined with reflector foil for maximum efficiency
Internal Fuse of the On-Off Switch: 4A
Related products
-

SteFly Canopy Flasher Red
357,00 € – 611,99 €incl. VAT
plus shipping
Delivery time: 5-7 Werktage / Business Days